
Getting started with PixiCloud photo booth software is is simple. In this post, we provide step-by-step instructions for account set up on our website portal. We will also cover adding your first Pixi device so you can start using PixiCloud along with our Pixi Android app.
Setting Up Your Account & Adding A Device Tutorial Video Here
In just a few easy steps, we’ll have your account up and running so you can start creating events and taking pictures with our photo booth app!
How To Set Up Your Account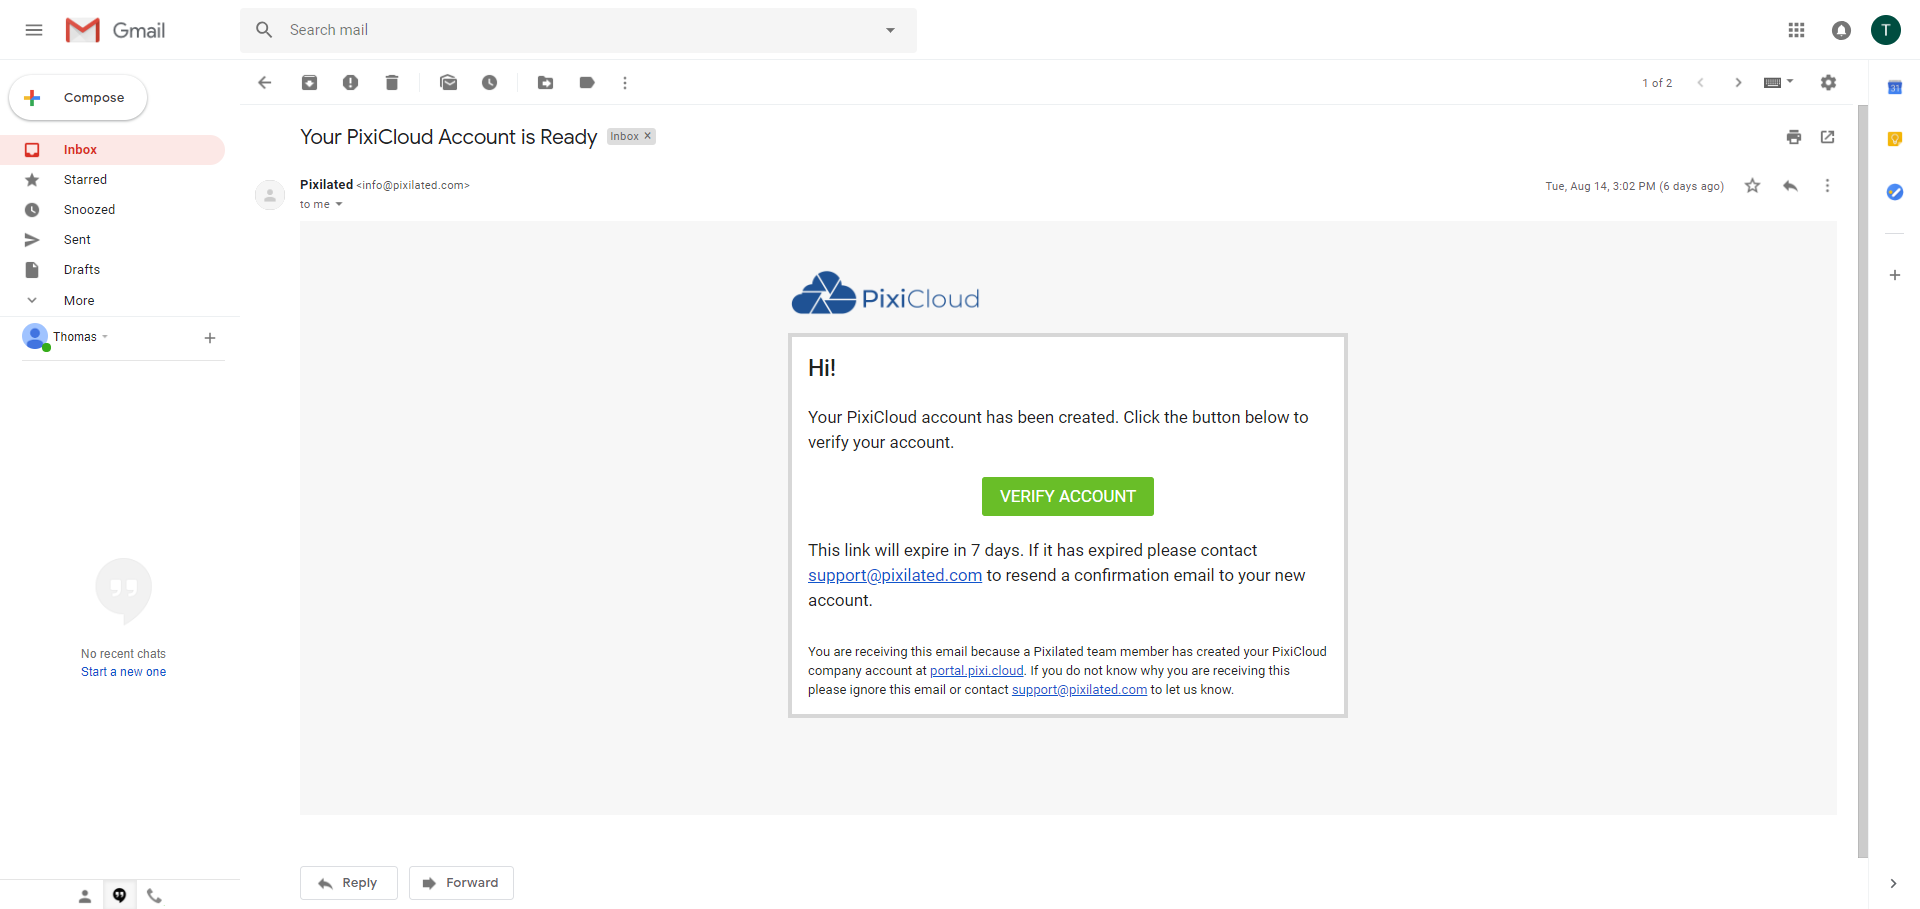
- After signing up for PixiCloud, you should receive an email with subject line: “Your PixiCloud Account is Ready”
- In the email, click on the green “VERIFY ACCOUNT” button
- On the “Verify Account” page, enter a new password for your account, confirm your new password and click “CONFIRM”
- Once your password is confirmed, you will be redirected to the “Device Management” page
How To Add A Device
- On the “Device Management” page, click on the green “+Add Device” button
- Give your device a new name and click “CREATE”
- A window will pop up on your screen with a Pixi Registration Code including instructions for how to install the Pixi app on your device
- Follow the on-screen instructions as listed:
STEP 1: On an Android device download and install the Pixi App on Google Play
STEP 2: Open the app and enter the 8 character registration code at the top
STEP 3: Follow the on-screen instructions in the app to finish setting up your Pixi
Leave a Reply